Chrome OS comes preloaded with tools for basic computing needs, including viewing, editing and managing your photo and image files.
While it’s not listed in the App Launcher, or available to pin to the shelf, the image app can be accessed by double-clicking on any supported image file (.jpg, .png, .gif, etc.) or selecting an image and pressing the ‘Open’ button in the file manager action strip.
Default ‘Slide’ View
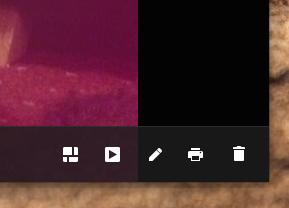
By default Chrome OS will open local images up in a detailed ‘slide view’ in the file manager itself. Here you can view your chosen image in more detail, and quickly access options available from the tool-strip located in the bottom right of the window.

Directly underneath an image you may, depending on the number of images in the same folder as the one being viewed, see thumbnails. You can navigate through this set using your mouse, or by tapping the left/right navigation keys on your keyboard.
Mosaic Mode
If viewing your images in detail, one at a time, is less than ideal you can also view more of them at the same time using the Mosaic layout. Here, all of the images stored in the same folder as the first one opened (or the selection opened) are displayed in a gridded, multi-sized thumbnail layout.
Mosaic mode can be toggled by tapping the ‘box of squares’ icon in the tools trip or by pressing the ‘m’ key on your keyboard.
You can scroll through the images horizontally using your arrow keys or a two-finger swipe to the sides until you find the one you want. Double-click on a thumbnail to open it in the slide view.
Slideshow
This feature does what you’d expect, cycling through your images fullscreen, one at a time. You can use the arrow keys to speed things up. Click on an image to pause the slideshow, and press any key to resume.
To exit the slideshow simply tap the Esc key on your keyboard.
Image Editor
As well as letting you view your images the Chrome OS image app also lets you make basic edits to them. From within the single-image slide view press the ‘Pencil’ icon (or tap the ‘e’ key) to open an image up for editing.
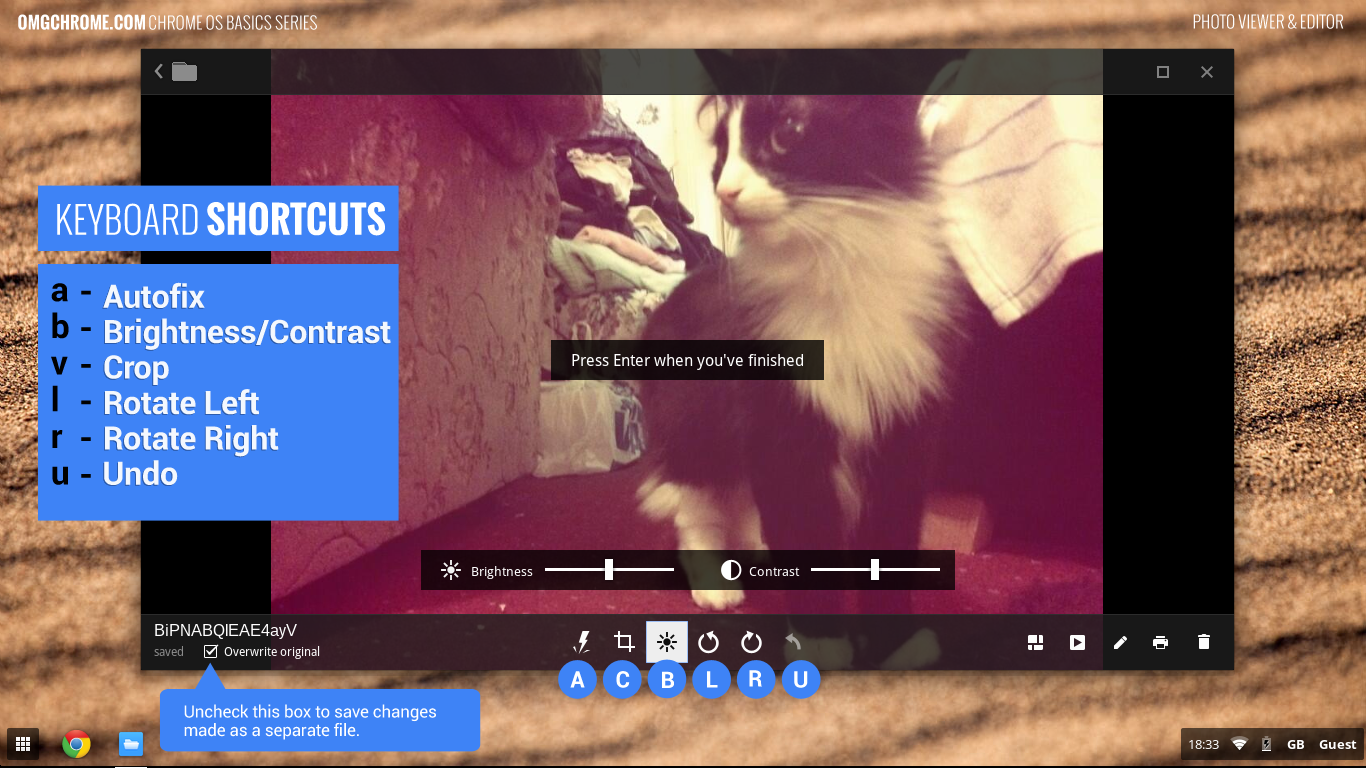
You’ll now be able to use the following tools to make tweaks to an image:
- One-click auto-fix of brightness and colour
- Adjustable crop
- Quick rotation
- Sliders to adjust brightness and contrast
All edits are automatically applied to the original image. If you want to preserve the original, with the edited version as its own separate file, uncheck the “Overwrite original” checkbox in the lower-left corner before making any changes.
Navigation
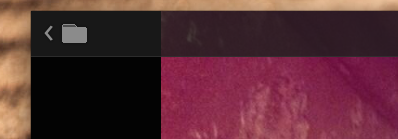
You can exit the Editor and move back to the image viewer at any time by clicking the folder icon in the upper left hand corner of the window.
Clicking this from the slide or mosaic views will return you back to the regular file manager view.
Keyboard Shortcuts
Want to use the Chrome OS image app like a ninja? Here are some useful keyboard shortcuts you can use to get things done a bit quicker.
When viewing an image in the viewer:
- e – Enter edit mode
- m – Toggle Mosaic layout
- v – Enable slideshow
From the editor mode:
- a – Apply autofix
- b – Open Brightness/Contrast slider
- c – Open Crop tool
- l – Rotate image left
- r – Rotate image right
To apply changes made: hit the ‘Enter‘ key.